Friday, June 5, 2015

Orange Juice Breakfast Donuts with Strawberry-Blueberry Curd!


I love a good homemade doughnut.  And since it is National Doughnut Day, we're making our own.  The ingredients are simple and delicious and it's probably stuff that you already have on hand.  We'll start with:

Ingredients:

2 sticks of butter
1 3/4 cup sugar
3 eggs
3 cups of self-rising flour*
1 cup of orange juice
1 teaspoon of vanilla

Optional: Confectioner's sugar


Now this is actually an Orange Cake Recipe that I adapted from a cookbook that we received some years ago.  If you'll note, that my recipe above adds 3/4 cup more flour that it calls for.  That will hopefully give us a more rounded doughnut than mine turns out to be.  Also, using Crisco shortening can give you a bit more "airy-ness", if you will. :-)


Tip #2: Always make sure that if there' flour, salt, or baking powder that is needed to be added to the mix that you have fully added it, and blended it together before added it to your battered mix.  With all of that being said, let's go!

Directions:

Cream together the butter and sugar.  

Add the eggs one at a time and beat for two minutes after the third egg is added.

Now once you begin to get that pretty yellow color mixed in there from your eggs, you're going to begin adding (alternatively) your flour and your orange juice.  Starting and ending with flour.  (So, flour, orange juice, flour, orange juice, flour).  That's simple enough, right? :-) 


And when you're done, you should have a yummy, creamy looking batter that is ready to go into your greased doughnut pan.


Just like with cupcakes, one full ice cream scoop, does the "do".

And all you need is one to fill the cavities on your pan.  Doughnut pan found at Target. :-)


Bake for 12 minutes on 350 degrees and your good to go.

Now for our delicious curd!  

You'll need:

2 cups of fresh berries
1/2 cup water
4 tbsp all-purpose flour
1 cup of sugar
3 egg yolks
2 whole eggs
4 tbsp of butter (chilled & cubed)

Directions:
 Bring the berries and water to a boil in a medium saucepan.  Turn down the heat to low and simmer until the berries are soft and separate easily, (about 5 minutes).  Transfer the mixture into a sieve and pass through using a spoon to help mash the berries.  Discard the pulp and reserve the juice.

Place the flour and sugar (already blended) into a clean saucepan and slowly pour in the berry juice.  Whisking constantly.  When thoroughly combined, add  the whole eggs and egg yolks and continue to cook until thickened.


Once the curd has formed (after about 7 minutes) remove from the heat and stir in chunks of butter.


Allow about ten minutes to for the curd to cool and in the mean time, go & sprinkle your doughnuts!


Flaky, butter, orange, doughnut cake goodness.  Oh, I'm not telling stories here, people.


I mean, I figured, that I just take one more bite, I mean...you know, for the camera, and all. ;-)


Well, I'm guessing that if I had just one more bite before lunch, it wouldn't hurt anything...


I mean breakfast, breakfast that's right.  So let's do one bite for breakfast, and one bite for lunch. and a bite for snack.  And...ut oh, what just happened, here?


Err...I think that you had better go ahead and make (and eat) these!


Pin It

Happy National Doughnut Day, Y'all!

xo -Bakie


Tuesday, June 2, 2015

The things we do for love....A Mulan-themed Birthday Party!

So my little girl, who is actually my "biggest" girl now, is turning 7.  And what does she want for her birthday?  Mulan.  Mulan it is!  She wanted a Mulan-themed birthday party held at one of her favorite restaurants.  So, the first thing that I had to do in my game-planning for this sweet girl, is to bring in Mulan in every shape and form possible without doing a table set up which is something that I would normally do at home.  So, for starters, we went with: 

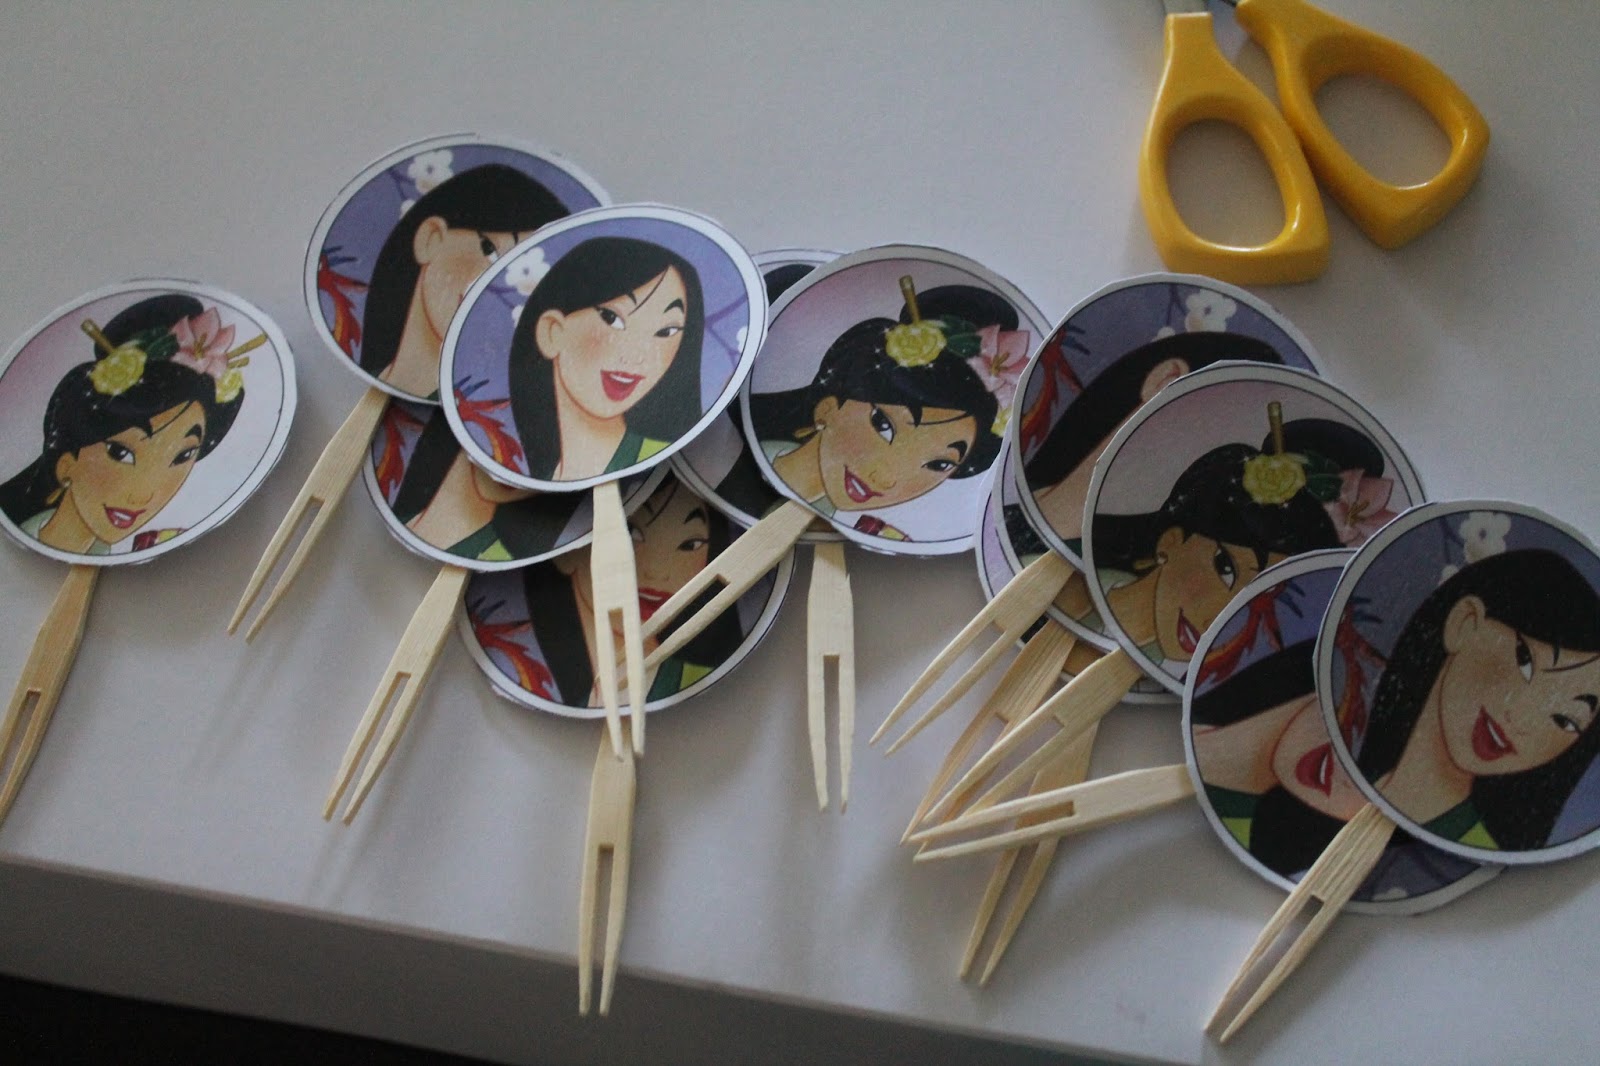
Mulan cupcake toppers...


Printed pictures of Mulan in frames.  (You'd never know it but kids go absolutely crazy by just seeing random pictures of their favorite character in frames at their birthday parties.  Not to worry, I won't charge you for that tip. ;-)


The girls also made little Mulan-themed fans, if you will.  (Really just simple 10-inch fans made from 12x12 scrapbooking paper that they got to embellish beforehand).
I had them put these nifty labels on them, too. 
 In addition to her cake pops, she wanted chocolate cupcakes, frosting with purple icing to match everything else Mulan.  Don't mind the Hello Kitty paper there.  It had to work, I mean, it just had to work.  (Hey, I needed something pink and was short on time, lol!)


All in all, I would say that the girls, especially the birthday girl, had one incredible time.  I hope that I have inspired you with some really simple ideas to love on your little one(s) for his/her next birthday!

xo- Bakie 


Wednesday, October 30, 2013

{Digital} Freebies...Never Give Up on Your Dream!

I seem to really love this girl:)  And I have been "directed" to her site a number of times and on a number of occassions.  And so finally, I have to just share.  Uh?  "Where have I been?"  I've been here, but I have been busy, stuck in life, and stuck in my head.  And so now, I have finally sat down, and so it is, "time to share".  Okay....Let's Go!

And here we go!
{*Note: This blog has taken on new life.  It started out as just a baking blog and that has now morphed into a baking/cooking/crafting/what's new and crafty/this is my life blog.  I hope that you're here to stay for the journey:) xoxo -Bakie}

 
****


Sketch Me Pretty: 11 Hand Drawn Circle Digital Graphics


I'm totally in love with transferring my sketches into digital graphics (See how to HERE!) I've always loved drawing- it's one of my biggest passions. The great thing about these graphics is that you can use them for anything. Website graphics, digital scrap-booking, chalkboard graphics, printables; the possibilities are endless!

By using these images you agree to my terms of use, which are included in the folder.

To see how to use these graphics in Photoshop or Picmonkey, see my tutorial here.


In this photo I used a combination of the Photoshop tutorial I linked to above, and my method for converting photos into shapes in Photoshop. That tutorial can be found HERE.


- See more at: http://www.welivedhappilyeverafter.com/2013/10/sketch-me-pretty-11-hand-drawn-circle.html#sthash.pqN72wnH.dpuf

Friday, August 30, 2013

40 days...many memories, many moments

I know what you are thinking...."Where have you been, Bakie?"   I know.  It has been a whole 40 days since I last posted and for good reason.  Last month we found out that my hubby's father was diagnosed with stage IV cancer.  And for that, we have temporarily re-located ourselves to the western part of the U.S. to be with him and help take care of him, etc.  So there you have it.  Like I said before, "for good reason" but with all of that being said, we all must eat.  Right?  So there will infact be more posts.  I have some goodies in store for you.  So, stay tuned.... this aficionado has got some treat in store for you.

Happy Friday All!

xo-Bakie

Saturday, July 20, 2013

What Two Ladies are Doing this Summer:)


I had the priviledge of learning about an awesome, awesome, ministry that helps support women in need in a special village in Kenya. On my blog Love Farm Cake I share a one-on-one interview with my friend, Kelly Lessard, as she talks about how she came to learn and be apart of the ministry at the Mercy House.
You can view the entire article here.
 
Happy Summer!
xo-Bakie

Thursday, July 11, 2013

On a Blog..Pictures are EVERYTHING.


I cannot emphasize that point enough...on a blog, pictures are everything.  And I mean EV-REE-THING.  It's the picture that "sells" you.  When you get a picture or walk past a magazine of some really good looking food, what's the first thing that goes through your mind?  "Hmm....that looks good..."  And what next, "That must taste good."  And that merely based on it's "looks"  (it's looks meaning, 1) looks, and 2) lighting and 3) positioning... the cleanliness of the plate and all of the details that are all around.  It can't just taste good.  It's got to look good.  This a (visual) BLOG after all.  So with that said, I am going to give you some of my all-time favorite foodie tricks because it's my passion that you see in what I capture both on the plate and on the screen.

Tip #1: Good Lighting/Natural Lighting
Okay, so you're having to take the picture with your cell phone (for whatever the reasons be).  Trick number one: don't worry about the background, just get that plate into some natural light.  The background is secondary.  If I see that odd, doors and windows are closed yellow light, you are not going to sell me as you would if you too your picture with the natural light flowing in, like you see on the cover of so many magazines;)
 
Tip #2: Get down on the level WITH the food.
Yes honey, stoop down.  This is your food after all.  Your product and your baby.  You have made it, now go and show that thing off, and proud.  Stoop down and get on the same level as the counter or plate.  Wherever the surface of your food item, I want you down on it's level.  Not these wierd above shots.  Now don't get me wrong, sometimes there's good in getting an above shot, to show a different angle.  (I know what you're thinking...."but you do it..."  Yes, but I only  and I emphasize only  do it to show a different angle.)  Why?  Because, I want you to approach my plate, not look in at a distance.  I am drawing you in with my pictures.  And I am not going to do that at a distance;)
 
Tip #3: NOW, set the plate/setting
This is not the first step.  Why?  Because you have to "respect the food" and treat it with dignity.  And once you've done that then you set the space.  And what do I mean?  If it's a dish that you eat with a fork, go grab a clean fork and set it on the edge of the plate.  Literally, make it look like, all that the reader has to do is to pick up the fork and start eating or...just take a bite.  It has to look that appealing and with the first to steps in place, you're good.
 
If it's a Thanksgiving or a Christmas meal, if you have it, go ahead and grab a nice holiday napkin, fold it, and set it under the plate just to the left. 
 
Got an idea for a breakfast in bed, write a little "possible note" to your honey, and fold the card at the top and set it next to the plate (on the right) to give your reader an idea of what they can do to make someone feel special.  In fact, your reader might even say inside, "my I'd feel good if that note/meal was prepared for me".  It's the reader's feelings and experience that you are giving and the story in essence that you are telling with your pictures. 
 
Won't you try these tips out today?  Okay, even if you're going to take a picture of your food with your phone, I want you to find a window, and make sure that it's during the day, put the plate on the counter, bend down with your phone at eye-level and then snap your picture and email it to me (bakiemesweet@gmail.com)  I can't wait to hear from you!
 
 
Happy Day!
xo-Bakie

Tuesday, July 9, 2013

Restaurant-Style Burger, Right-at-Home

One of the things that I love best about being able to cook at home, is eating food that you can make yourself to taste just like something that you'd have at restaurant.  And that is exactly what we did with these burgers. 

For a lazy evening, we decide that we're eating in and that means, making dinner at home.   Out walks the ground beef, on, turns the grill.  My hubby grilled these for me but if he wasn't a grill-handler, we could make these same 4 patties indoors.
 
All you need for your burgers:
~One package of 93% lean ground beef
~Some all meat seasoning*
 
(*We like to use a combo of salt, pepper, garlic powder, and chili powder, all mixed up in a container or a baggie and we shake it on just about anything;)
 
 After are burgers were done, we grabbad few whole wheat buns (trying to make it restaurant-style so the whole wheat buns made it feel like something special), some dijon mustard, lettuce, a nice thick slice of tomato,

And these 100 calorie guacamole packets.  LOVE!  Okay, these little pre-made guacamole packets took our burgers to THE.NEXT.LEVEL!
Okay, add some bbq potato chips on the side, and you're good.  So happy that we're eating in tonight!
 
What are you making?  Do you have any restaurant favorites that you like to re-create at home?
 
Happy Eating Everyone!
 
xo-Chemeeka

Monday, July 8, 2013

Patriotic Berry-Rich Smoothie


Happy Monday to you!  I hope that you had a happy & safe post-holiday weekend:)!  I thought that this smoothie would be a great way to kick-off the week & a Monday morning at that;)  One of my little ones, has been begging, and begging me to make a smoothie.  So I have finally gotten around to it.  And so here we go....Easy, fresh, tasty and did I say, "healthy?"  Oh yeah.  Who is with me?

I have to admit that as much as this smoothie was healthy, it is tasty.  Here's what's in it:
 
1 1/2 cup lowfat milk
1/2 uncooked regular oats
1 cup frozen blueberries
1/2 cup sliced strawberries
1 tablespoon of molasses (for good measure...er....something like that;)
(Well the blog name is Bakie Me Sweet after all:)

I could not find the bottom base to our blender so, in the food processor it goes.  I just pulsed this on medium speed.  And there we have it.  Easy enough, right?

 
For me, it is the perfect start to a Monday morning.  *Note: you could also substitute in 1/2 cup of plain unseasoned silken tofu for the 1/2 cup of lowfat milk.  Just as good, and would make it a touch creamier.
 
 
 And there you have it.  A great smoothie for a great start to your week:)  What are some of the things that you like to drink or make (besides coffee) that gives a real boost to the day?  I hope that you're having fun grabbing some of these recipes.
 
Happy Monday to Ya!
 
xo-Bakie:)


Thursday, July 4, 2013

Star-Spangled Blue Velvet Cupcakes-in-A-Jar

 
I thought that I would re-post this fun, delicious and need-I-say portable treat for you to try:)
 
Happy 4th of July Everyone!
 
xo-Bakie
 
* * * *
There's nothing like a portable treat when you're ready to enjoy yourself at a barbecue or picnic.  For this 4th of July I have decided to make my version of cupcakes-in-a-jar with blue velvet cupcakes-in-a-jar.  The recipe is super easy & promising to be a colorful treat!  Just start with:

Ingredients

1/2 cup vegetable oil
1 cup buttermilk
2 eggs
1 teaspoon white vinegar
1 teaspoon vanilla extract
1 1/2 cups sugar
2 1/2 cups all-purpose flour
1 teaspoon baking soda
1 teaspoon salt
1 1/2 tablespoons Dutch-processed cocoa powder
2 tablespoons royal blue gel paste food coloring
1 tablespoon purple gel paste food coloring

Preheat the oven to 325 degrees F. Line a cupcake or muffin pan with 24 regular-size cupcake liners.

Place the oil, buttermilk, eggs, vinegar, vanilla, and sugar in the bowl of an electric stand mixer and beat with the paddle attachment until thoroughly mixed. Sift the flour, baking soda, salt, and cocoa powder together and slowly add to the mixer on low speed. Scrape down the bowl thoroughly, as needed. Add the food colorings in a steady stream until desired shade is achieved; it should appear bluish-purple. Beat for another 3 minutes. Scrape the bowl one last time and mix for 30 seconds by hand.

Fill the cupcake liners two-thirds full with batter and bake until they form a semi-hard crust on top, about 25 minutes

Once they are cool, I slice them in half. You will have a stack of tops and a stack of bottoms.
Place 1 bottom in each jar. Put a layer of the frosting.

 Take the top of the cupcake and place on top of the layer of frosting.
Beautifully frost the top of the cupcake.
 Add sprinkles between the layers for that extra festive touch :)

For a double decker, cupcake and frosting add another cupcake, repeating the first three steps.  Lastly, attach a small wooden or plastic spoon with baker's twine & you're good to go!  This treat is easy, sweet, and has very little clean-up.  Bon Appetit everyone!

And a Happy 4th of July!
 -Chemeeka
.