Wednesday, March 30, 2011

Potato Ice Cream

Just when I thought I was being "original"...I was sitting here eating some Vanilla Heath Bar Crunch ice cream and  thought,"what if I made potato ice cream with toffee and bacon bits?"  Well, I did what any normal person would do and go to the internet to see whether or not anyone's already beat me to the punch.  And whaddaya-know?

Ba-ding!

There's a Grilled Idaho Potato Ice Cream Recipe made with...you guessed it milk chocolate cake (I didn't think of that part) and toffee and bacon bits.  Looks like someone's already thought of this. (Bummer!)  No worries though.  My idea does infact differ from the recipe seen here.  But I will go ahead and share it with you guys anyways.  In the meantime, I will be making my potato ice cream idea/recipe...and I will be sharing it with you.  Have a great day & happy gawking :-) -Bakie

Grilled Idaho Potato Ice Cream Recipe

With Milk Chocolate Cake & Bacon Toffee


When you’re looking for a special twist on that favorite combination of chocolate cake and ice cream, turn to pastry chef extraordinaire Gael Gand, co-owner of Chicago’s illustrious restaurant Tru, and you’ll get something memorable. The Idaho Potato Commission asked Gael to think of a special potato dessert, and the result is with her compliments. The grilled potato skins give a slight, smokey flavor to the ice cream base (they are strained out before the ice cream is churned) which pairs well with the bacon toffee. The flourless milk chocolate cake is cut like a brownie.
Components


Grilled Idaho Potato Ice Cream

Ingredients
  • 2 cups milk
  • 2 cups cream
  • 4-5 each skins of grilled Idaho potatoes
  • ¾ cup sugar
  • 9 egg yolks
Idaho Potatoes
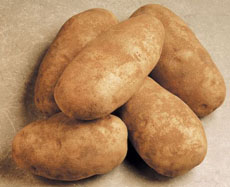
Mash the insides of the potatoes and enjoy separately. Photo © Idaho Potato Commission.

Preparation
  1. Bake potatoes. Cut in half; scoop out flesh and make mashed potatoes with it at a later time. Spray the denuded potato skins with oil (or for superb results, dab lightly with bacon fat) and grill. The idea is to get the skins smoky-tasting, but do not burn.
  2. Bring the milk and cream to a boil with the potato skins.
  3. Whisk the yolks and the sugar together. Temper the liquid into the yolk mixture and return to stovetop.
  4. Cook until the mixture thickens enough to coat the back of a spoon.
  5. Strain and cool in an ice bath. Process in ice cream machine.

Milk Chocolate Flourless Cake

Ingredients
  • 1-¾ cups quality milk chocolate
  • 2/3 cup butter
  • 4 each eggs
  • 4 each yolks
  • 2/3 cup brown sugar
  • ½ cup almond flour or ground almonds
Preparation
  1. Melt the milk chocolate and butter
    together.
  2. Temper the eggs into the chocolate
    mixture.
  3. Pour into a foil-lined half sheet pan.
  4. Bake in the still oven at 350°F until
    done, about 15 minutes.
  5. Cut into 2x2.5" rectangles.
Scharffenberger Milk Chocolate
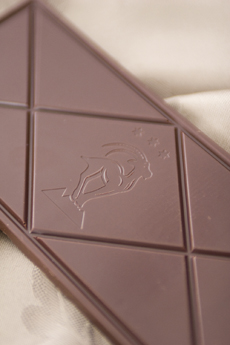
Scharffen Berger 41% cacao dark milk chocolate. Photo by Saidi Granados | THE NIBBLE.


Bacon Toffee


Ingredients
  • 2 cups cooked bacon, crushed
  • 3 cups brown sugar
  • ¾ cup water
  • 1 cup glucose (or light corn syrup)
  • 1 stick butter
  • 1 teaspoon vanilla extract
  • 2 teaspoons baking soda
  • 1 teaspoon salt

Preparation
  1. Combine water, glucose, butter, and brown sugar in a pot over med-high heat; cook to hard crack.
  2. While sugar is cooking, warm 2 silpats in the oven.
  3. Take sugar off heat, stir in bacon, vanilla, baking soda, and salt. Stir quickly until it gets lighter in color and starts to pull away from the sides.
  4. When toffee is ready, pour onto warmed silpat, and top with the other warm silpat.
  5. Roll as thin as possible.
  6. When cool, chop into small pieces. Reserve in airtight container
Vanilla Extract
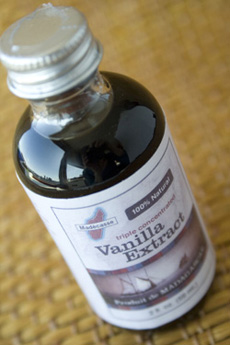
See our review of the best vanilla extract. Photo by Claire Freierman | THE NIBBLE.

Chocolate Sauce

If you don’t want to make chocolate sauce from scratch, you can buy a ready-made sauce. Our favorites are Somebody’s Mother’s and The King’s Cupboard.
Ingredients
  • 3-¼ cups cream
  • ¼ cup glucose (or corn syrup)
  • 2 cups quality dark chocolate
  • 1-½ tablespoons butter

Preparation
  1. Bring cream and glucose to a boil.
  2. Pour over dark chocolate.
  3. Whisk to emulsify.
  4. Add butter last, whisk to combine.
  5. Transfer to squeeze bottle.
  6. To serve, sauce should be thin enough to spread into a thin circle when poured (may need to add cream or warm slightly).


Photo courtesy of Wisconsin Milk Marketing Board.
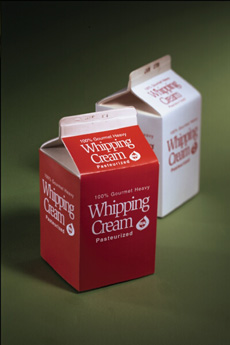
Cream


Tuesday, March 29, 2011

My Sister is Having a baby!

Everyone that's had siblings younger than us...or even significantly younger than us remember the fun of teaching that brother or sister little things or getting in trouble together (sorry Mom).  But even if there's not that much of an age difference you probably remember the fun of having someone that was younger than you to partner with.  Well my baby sister (only 14 months younger than I...I know, I know...I sounded like an "old wise one" in my intro...) is having a baby.  Her and her beaux have already picked out a name and she's asked me to make these pretty little bitties for her baby shower.
So since her shower is a purple and white girl-themed shower, I am doing white rattles baby rattles with purple ribbon and purple rattle pops with white ribbon...you get my point.  In addition to that, I've also decided to throw in a few surprise Bakerella-inspired cake pops.  If you didn't already know it, I am now fascinated with the 'new-to-me' Bakerella and her creations.  You'd think that I had been living in a cave to know that I have not heard of her until now...especially since I consider myself an aficionado in the baking world...Not.  Humbling myself is at hand.  I've got a lot to learn and a ways to go.  So here's my take on my sister Chenelle's purple and white baby rattle pops and coordinating cake pops.  Courtesy of me...Bakie@ BakieMeSweet.

Oh..wait a minute..I left out one really important thing.  If it wasn't for my friend Angie, I would never even know about Bakerella!  She is a party planning and crafting extradonaire...you can not touch this woman!  Okay, okay, I am going on a bit but in my eyes, and in the eyes of many others she is among the likes of your classic Amy Atlas, Hostess with the Mostess and more.

She is the one that had the Cake Pops cookbook by Bakerella that caught my eye and piqued my interest so...hats off to you Angie..and a big thank you  for your crafting and creative sweet styling influence and the inspiration that helped this blog come to into being!

Deep breath & exhale...

Okay, are you guys ready to get on and see what I did for my sister's baby shower?

Here goes:

I started out with a bag of lavendar/purplish wilton melts (not a very good picture..sorry.)
 And I had to get these little guys to make sure that I color inside the lines :-)
 Microwave a few melts (approx. 30-35 seconds)...
 Stir...
 Paint...
 Fill...
 Okay so I didn't stay totally within the lines...
 But I think that I did better with the white ribbons...

 Finished product! (Except I made about fifty of 'em).
And then I made her some cake pops to go with it.  I went with a french vanilla cake mix and rainbow chip frosting from Betty Crocker.  I thought that the rainbow chips would make it fun & whimsical.


One thing that I didn't know was that the top of my cake was going to brown.  So I wasn't that happy with that part of it because I wanted the center to just look like a white or yellow cake...but that's okay :-)

So I baked, scored (sliced) and crumbled my cake down in the food processor.  I saw that little trick here and thought that it worked well for me.  (*Another tip: I cut off and ate (lol) the hard edges off of my baked cake...what do you do with yours?)

This time around I only mixed half of my frosting with the cake...hence better cake pops :-)

Mixed...
Rolled...
Wrapped....

And double-wrapped...


Then freezed (for about 2-3 hours...I don't know if that's the best route, really.  I have heard of people like my friend at Rhapsody making her cake balls up the day before prior to making pops out of them and dipping them).

And now it's time to dip and cover with sprinkles :-)
First the unveiling...voila! (haha)
I've got my purple melts and white sprinkles ready (which you can barely see the sprinkles, but they are there in the small ramekin on the right).
And then I tried this trick which I saw on Bakerella's site (I think) and on Rhapsody.
And that is to dip the candy stick into the melts or the chocolate that you're using to form a sort of a "bond" between the stick and the cake part of the cake pop.

And then we dipped, dipped and dipped some more until we finally got these little pretties!


These certainly aren't the best cake pops I've ever seen...
but they'll do :-0


Happy Baking!  xoxo Bakie


Saturday, March 26, 2011

Hat's Off to Bakerella!

Okay, these sweet treats are everywhere!  Pioneer Woman, you called it (about half way down in your post when you said that "it was just a matter of time before cake pops sweep the nation...or not").  Cake pops have taken and they are sweeping the nation!  So much so that Starbucks has taken them on.  And not only that, but they're even creditting our baking mama, Bakerella for it (for all of us little "bakies":).

Check it the article out:
(As seen on Starbucks.com)

Did you believe confectionary elves were behind our newest delectable treat, the Cake Pop? Well, Chris C. is the lead product developer on Starbucks Petites, and while he’s no confectionary elf, he did an amazing job here. I chatted with him about our latest treat to get the inside scoop on how it made it from his mind to your mouth. 

Question: Why Cake Pops?
Answer: A Cake Pop solves the ever lasting question of how to make cake portable – it’s whimsical, fun and delicious cake on a stick. What’s not to like? This has been an emerging trend popping up in specialty bake shops, on blogs like Bakerella and even touted by Martha Stewart. Because cake pops require a very gentle, handmade process to roll, dip and decorate, they prove very difficult to make on a large scale. I have to credit Lisa B., our food R&D manger, for championing this idea. Between our bakery partner, Lisa, and myself, we were able to create a high-quality experience. Everyone can now eat cake on the go!   

Question:  How did you pick the flavors?
Answer: To celebrate our 40Th year a Birthday Cake Pop was a must. The Tiramisu Cake Pop spoke to our coffee heritage and the Rocky Road Cake Pop was just a fun flavor we thought people would like.

Question: I confess, I tried to make a Cake Pop and it slid off the stick. Any secrets to get the pop to stay put?
Answer: Oh boy! This was a significant problem early on. We spent months trying to stabilize the cake. At one point we thought of using a two-pronged stick to pierce the pop in place or adding a basket holder for stabilization. Ultimately, reducing the size just slightly and double-dipping the stick in chocolate solved the problem. I must admit, the night before launch I could hardly sleep with visions of Cake Pops falling into coffee cups as people tried our new treat. I’m now sleeping much better.   

Question:  So they’re all under 200 calories, which is amazing, but how many did you have to eat to make the perfect Cake Pop?
Answer: Six thousand, three hundred and ninety-five. Not really. But I ate quite a few!


Thursday, March 24, 2011

Rainbow Pudding...Too Cute Not to Share!


Spring Clover Dessert Plates 8ct
This was too cute not to share...first off, this is not my recipe in anyway shape or form.  I started off on a bunny trail from here then I went there and then ended up here.  And that's when I just had to share it with you!
Is it me or does this pudding not look absolutely YUMMY?!

As Seen on:In the Kitchen

Here's how you make it:

Ingredients
3/4 cup sugar
1/3 cup cornstarch
1/4 tsp salt
1 cup 2% milk
2 cups whole milk
1 whole egg plus 3 egg whites
2 tbsp unsalted butter
1 1/2 tsp vanilla extract (clear if you can) or 1 vanilla bean
Gel food coloring (such as AmeriColor) in red, orange, yellow, green, blue, and purple

Materials

Saucepan
Whisk
6 small mixing bowls
Clear bowls, small juice glasses (clear), or tall shot glasses
6 disposable pastry bags
Notes: If possible, use gel food coloring instead of the traditional food coloring found in grocery stores. Gel food coloring produces vibrant color results with just a small amount of dye.
If you prefer more yolks in your pudding, try this simple substitution: 3 whole eggs in place of the egg-and-egg-white combination in this recipe. Additionally, decrease the amount of cornstarch to 1/4 cup plus 1 1/2 teaspoons.

Directions

Classic Vanilla PuddingRainbowpudding-Stirmilkinsugar
Step 1: Add the sugar, cornstarch, and salt to a medium saucepan (preferably stainless steel). Whisk the ingredients to combine, then add 1/2 cup of the 2% milk to the sugar mixture. Using a wooden spoon, stir until combined and thick.
Rainbowpudding-Addremainingmilk
Step 2: Whisk in the remaining milk (2% and whole), cooking over low heat. Stir constantly with a wooden spoon for about 15 minutes. Do not let the mixture boil.
Rainbowpudding-Hotmilkintoeggs
Step 3: In a medium bowl, whisk the two eggs until gently beaten. Slowly add about 1 cup of the hot milk mixture to the eggs, whisking as you pour. Then pour the milk/egg mixture into the saucepan with the remaining hot milk mixture.
Rainbowpudding-Vanillapudding
Step 4: Cook over low heat for an additional 5 minutes - do not boil. Remove from heat; stir in the butter and vanilla (or vanilla bean).
Rainbow Pudding
Step 1: Add the pudding to a medium bowl and cover with plastic wrap, pressing the plastic against the surface of the pudding until airtight. This will prevent a skin from forming. Refrigerate until well chilled, about 1 hour.Kid's Kitchen: Rainbow Pudding


Rainbowpudding-Gelfoodcoloring
Rainbowpudding-Stirinfoodcoloring
Step 2: Divide the cooled pudding evenly into 6 medium mixing bowls. Add food coloring to each bowl, corresponding with each color of the rainbow. Stir; add more food coloring (if desired) until desired color is reached.
Rainbowpudding-Puddinginbags
Step 3: Divide the colored pudding into 6 pastry bags. (See: Tips on Filling a Pastry Bag if you need help filling the bag with less mess.) Alternatively, you can just spoon the colors into bowls, but that can be a bit messier. Snip the end of the red pastry bag off so that there is about a 1/2" diameter hole. Pipe the red pudding into each bowl. Repeat with remaining colors.

Hat's off to Katie Goodman for this delicious & bright creation! (Did I say that this was not my original creation? ;-)
Hatley The End Of The Rainbow ApronSt. Patrick's Day Irish Springerle Cookie Gift TinHappy St Patrick's Day Dessert Plates 7in (8ct)Ateco 1112 12-Color Food Coloring Kit